Author Archives: howie

Day of Experiments at Techshop

Today I spent the day at TechShop San Francisco.  I spent a couple hours designing in Corel Draw, then had two hours on the laser (unfortunately, the bulb was overheating, so productive time was less).

First, I made a jig and etched off the paint of pennies that I had spray painted to leave text behind:

This is using 70% power and 4 passes.  It looks ok, but I need to have at least two layers of paint, and use a higher dpi.  I’ll get some shiny pennies and try again.

Next project was to make a more solid prototype for the doll chain resulting in this:

If you’re curious, it’s a black sock stretched over a jar.

Next project was to experiment etching magnifying glass lenses.  For the tank periscope, I need to have a crosshairs.  Not sure what lens I’ll need, figured I’d give it a go.  I experimented with an off-label uses of the laser – instead of printing a raster image, I used a vector at only 15% power (tried lower power first, but not deep enough).  Result is this:

I am going to try rubbing in some pigment so the lines will be more visible.

The last, and primary project of the day was to make a wooden frame using a magnifying glass motif that I designed in Corel.  The laser died midway through the first attempt.  The second attempt worked, but unfortunately didn’t quite punch all the way through and the result was that it broke when trying to remove it from the waste wood.  I did get a good L shape out of it which will give you an idea.

I may switch to acrylic.  Also, not sure whether I will use glass a a backing, or wood.  I may very well add in border rectangles both in and out, so I won’t need anything else.  I might be able to also flip it over and raster on a groove around the inner rectangle to hold a piece of glass.

I also learned how to TIG weld today.  I have to say, it’s really quite fun!  I like how delicate it is, and the great control you have.  I’ll have to practice a lot more, as it requires a lot of technique to do well.

Tank Periscope

A while back, I purchased this extremely heavy brass/copper piece which was supposedly part of the periscope optics in a WW1 Tank:

From a WW1 Tank (assumed)

As with the bomb sight, I plan on mounting it vertically on the wall so you can look down into it.  Unfortunately, it only has one lens, so I’ll need to add some lenses to focus the image.

The image I am planning on using will be that of “Tank Man”, the unknown insanely brave protester of the Tiananmen Square protests of 1989.  Instead of using the famous photo:

Published by The Associated Press, originally photographed by Jeff Widener

I will try and produce an image of what he would look like from the front.  In other words, the viewer would be in the place of the tank gunner.  Think about what that must have been like.  I don’t think I’ll bother with any text.

For the mount, I’m thinking of using the CNC plasma cutter to cut out Chinese characters with one or more Confucius quotes in several vertical lines wrapping around.  Forming into a tube might be difficult, but I’ll try.  I bought a Confucius quote book a while back – quite the brilliant moral philosopher, he was.

Electroplating – notsomuch

Well, my experiments at electroplating failed. Probably need to go the chemical route.  I’ll put it on the back burner.  I am going to try burning off paint tomorrow on the laser to see how that looks.

Electroplating

Today I’ve been experimenting with electroplating.  I’d like to “print” brass text on a copper penny, but first need to make sure I can get any brass on it in the first place.  I’m avoiding anything requiring toxic chemicals/heat in favor of an electrical solution (1.5 volts ain’t gonna kill me).  Here is a bath of vinegar, salt, and sugar with two pennies in it. One has had its copper scraped off and the underlying zinc is the source metal.  If and when the zinc adheres to the other penny, I’ll heat it up which will cause the zinc and copper to form yellow brass.  Cross your fingers – first try was a flop.

Electroplating a penny with zinc from the core of another one.

Origins of my current series

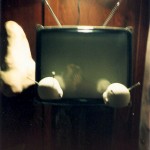
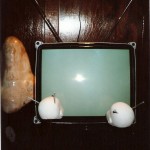
In the mid 1990s, I made this piece:

It’s made from an old picture tube (removed from the TV for esthetic reasons mostly), with two ghostly babies hovering in space in front of the screen watching it.  The babies have nails driven into their heads to resemble antennas.  While it’s difficult to see in a photo, the lighting and angles are such so that when you look at the screen, you see the reflection of the watching babies, but also your own head complete with antennas coming out the top thanks to the two mounted on the television.  Hopefully it creeps you out a little bit.

This is the first time I made a piece that requires the viewer to be a participant, since without the viewer seeing his own head with antennas, it doesn’t really work.

Bombsight

I bought this WW2 era English Bomb Sight. It looks to be made of several different metals (brass, bronze, steel), is quite heavy, and the optics are in great shape.  It’s a beautifully made object.

WW2 Bomb Sight

I am planning on keeping the object as-is, as the object is an antique, and any transformation would diminish it.  However, I’m going to make a decorative mount for it by wrapping a metal doll chain around it that looks like this (note the negative space):

I’ve made a paper prototype by cutting the image on a laser cutter and wrapping it around. It looks quite good, with the bombs not being immediately visible.  I will use a CNC Plasma cutter to cut it out of 16 gauge steel which I’ll then put on the metal roller to make it into a ring.  I’ll then TIG weld the ends together, and then weld the ring to a support that will mount the piece vertically with a slight angle pointing down about ten degrees from vertical so that a viewer can comfortably look through the eyepiece without banging his head against the wall.  I will probably powder coat the result to protect it – not sure if I’ll use clear or black. The support needs to hold a magnifying glass below the bombsight to focus the image properly, as the focal length of the bombsight is way too long.  Below that, I’ll have the “image” itself which will be barely off the wall. The image will say “This is how your great-grandparents’ house was last seen.”

Rifle Scope

So, I bought a rifle scope which I plan on featuring in a piece:

The magnification is pretty much telescopic, so it’s  difficult to work with. I’ve been playing with various mirrors, lenses and prisms to form an acceptable sized image that’s sharp.

I have three ideas so far:

  1. Have the scope pointing down at a magnifying mirror and reflecting back up at your face. This puts the your other eye in the crosshairs.  Unfortunately, this only works half the time, since it depends which eye you look through.
  2. Have a series of lenses an mirrors/prisms between an image and the sight forming a complex optical path.  The text would say “Trick shot”.
  3. Have the viewer look through the back side of the scope. With the addition of magnifiers, I’d hopefully make the image big enough to be viewable.  The image would display text “This is the view from the business end.”

Any opinions?

Pennies in the eyes

I’ve figured out how I am going to display the “You are on the wrong side” text.  Below are pictures of prototype through each eye.  I am using two shiny pennies which I’ll be writing the text on.  Click to see larger versions, as the text is hard to read otherwise.

The pennies work on several levels:

  • They are copper so they match the mask
  • They are round, so when viewed from the right place, take up the whole eyepiece.
  • Pennies go on dead people’s eyes.
  • I am showing both heads and tails of the penny. One says “In God We Trust” on top, and the other says “United States of America”.  The wrong side can apply to either, depending on your viewpoint.
  • They are money, which goes with the war spoils theme.  I will get a 2003 penny for the heads coin (start of Iraq war)
  • Having both a heads and tails implies that it is simple luck which side you’ve wound up on.

Now I’m debating on how to write the text.  I can do it by hand (which is a LOT easier) which will give it a graffiti look, or try using a laser engraver to blast away paint exposing the copper below.  I’m leaning towards the former, as the graffiti idea trumps the perfect text.  I’m also entertaining the idea of mounting the mask on a dark background.  I like that it is free-hanging, but a dark background would go better with the metals. That said, being a nerd, I think I’ll try the laser approach anyway, perhaps with some plating: Painting the coin, making a jig out of scrap acrylic to hold coin in place, lasering off the text to expose the copper underneath, soaking in NaOH and Zinc to plate the exposed copper, then removing the paint so that I’d have a two color coin with the letters being zinc and the background copper.   I’d probably try heating the coin to turn the zinc into yellow brass so it looks golden. I’m sure it won’t go smoothly, but I’ll learn something in the process.  If that doesn’t look good (maybe not enough contrast between metals to be legible), I may just etch off the paint leaving black paint for the letters.  In any case, it will be fun.

Steampunk Gas Mask

Steampunk gask mask

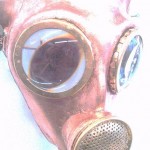
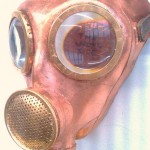
I am reasonably satisfied with the gilding results.   Not perfect, but the surfaces I’m gilding are irregular and require repeated touchups.  The copper mask looks better than I had hoped.  I replaced the flat plastic eye pieces with strong lenses (taken from zoom lenses).  It looks quite cool to wear, especially how it magnifies the eyes.  It also looks cool the way it distorts what’s in the distance.

I’m in the process of attaching a backing support to it.  After a few experiments, I’m using some very think copper wire on the back that I’ve bent into a 3 dimensional “outline” of the edge of the mask (it doesn’t show, but I like that it’s copper too)  and poking stitches through the mask and tying it on with thin copper wire.  I’ve bent the wire into a fairly triangular shape as I like how it makes the mask resemble an animal with the tabs on top being horns and ears.

Once that’s done, I’ll figure out how to hang it, and then how to suspend text behind the eyes – probably will solder/braze some wire together for the supports.  One unfortunate thing is that by mounting it on the wall, the optical effects of the lenses are reduced to magnifying a dark region.  However, because I chose strong lenses, I’ll be able to suspend text very close to the lens. This will allow more light to get in, and also prevent you from looking in one eye and seeing the text for the other.

Gilding Day

As part of Magnifying Glasses 2.0, I’ve been working on a piece entitled “You Are on the Wrong Side” which is a mounted gas mask with the text (the title) visible through the eyes.  Yesterday I stripped off the existing paint on the eye, nose and mouth pieces to reveal some beautiful brass around the eyes, and some ugly gray aluminum on the other parts.  I decided to break out my package of gold leaf to see how it would look, as I want the metallic parts to be the same color.  All in all, it looks better than I expected.  It is rather difficult to get the gold leaf into the crevices, but with repeated touchups, I think I’ll get there. I then tried out copper leaf on the rubber mask itself, and to my surprise, it adheres quite well!  I removed the bronze pigment powder that I had put on yesterday and brushed on a coat of size (aka glue) before leaving the studio.  Hope all goes well tomorrow.  I still need to work on the mounting and the text itself, but that should be the easy part.

It’s my goal to make the mask a paradoxically beautiful object, and on the conceptual side, it implies the riches made on warfare, giving more meaning to the text beyond its initial pun.